All Import
This documentation provides guidance on importing products to Globber's website, featuring a demonstrated example focused on pricing.
How to Import Product Pricing
To learn how to export a file before importing, see the Export guide here.
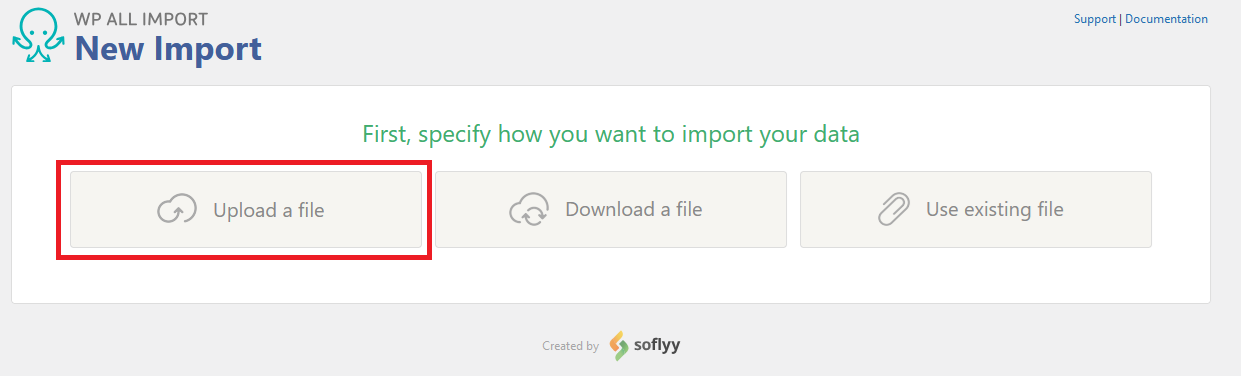
In WordPress, Navigate to All Import on the left-hand menu in WordPress and select New Import

Select Upload a file to attach your relevant CSV file.
When upload is complete, select Existing Items under "Import data from this import file into..", and also select WooCommerce Products underneath before you proceed to Step 2.
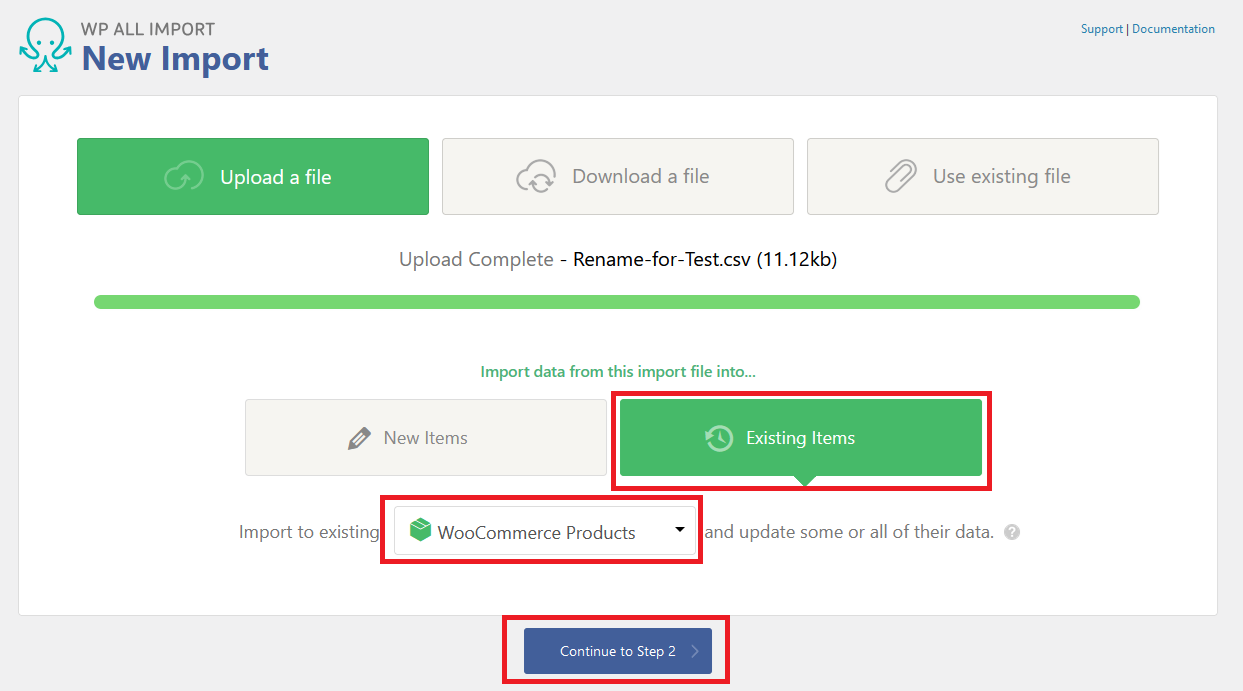
Once that is done, you can proceed to Step 2 by clicking Continue to Step 2.
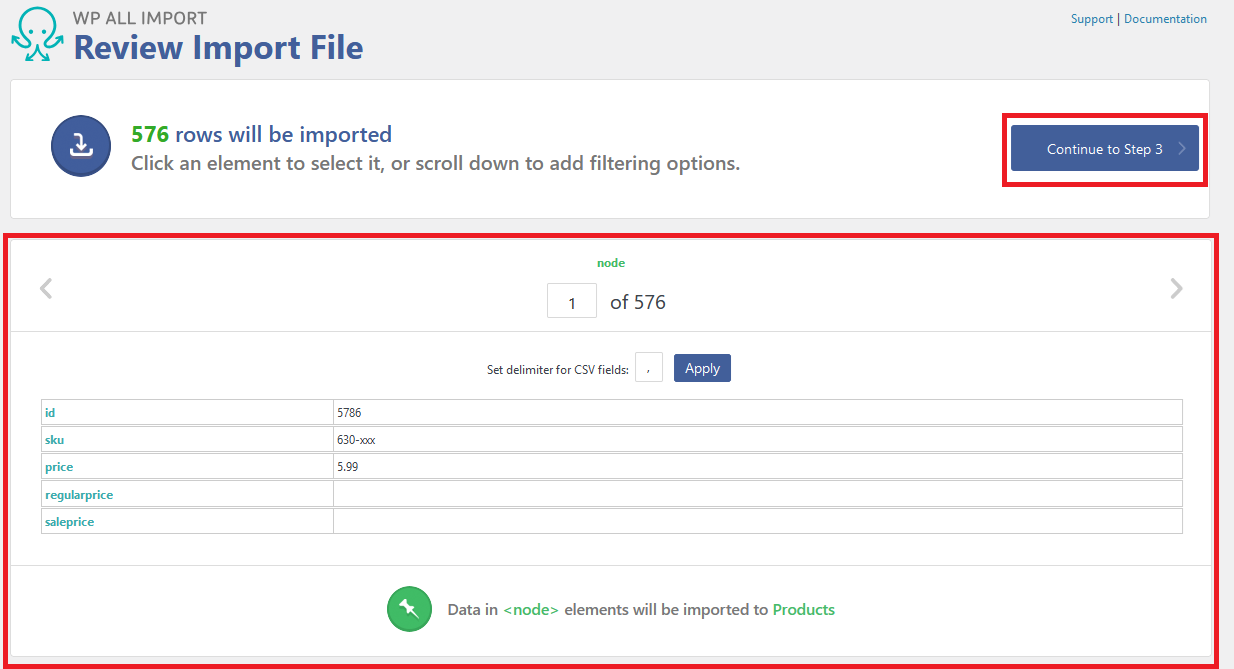
Step 2 displays all the data that are found inside the CSV, click Continue to Step 3 to import configuration.
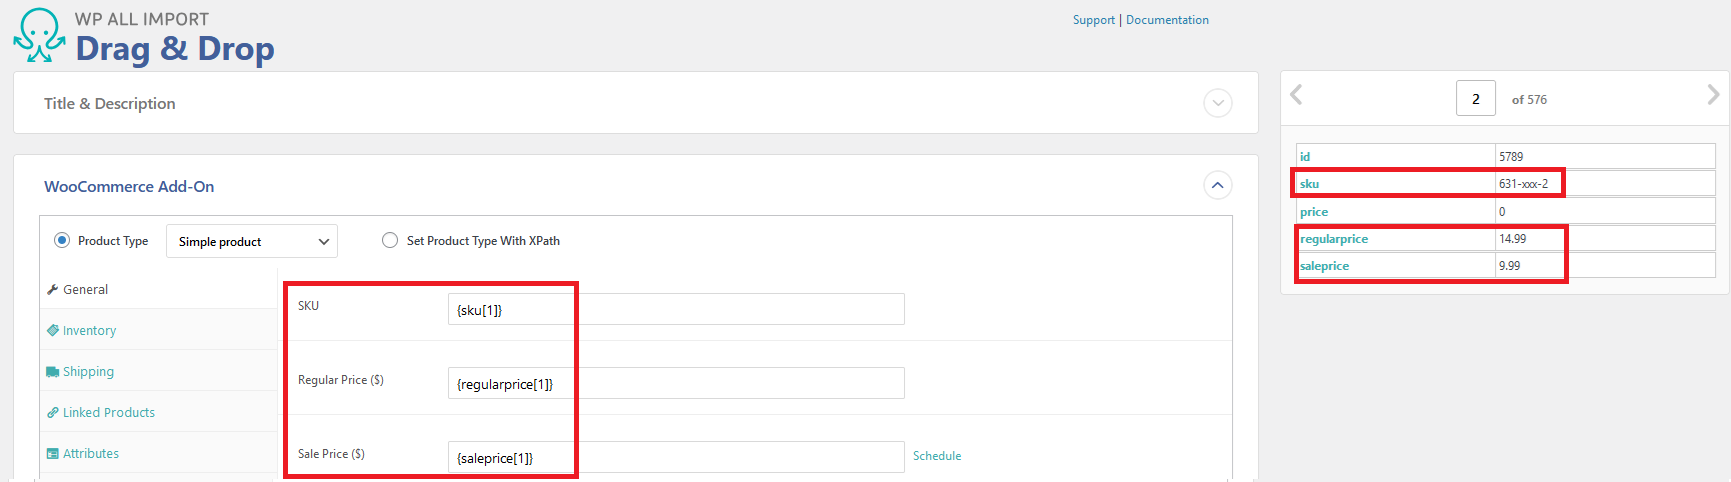
In Step 3, navigate straight to WooCommerce Add-On tab as this is the only focus for this example when it comes to importing new product prices.

In WooCommerce Add-On, click and drag sku, regularprice and saleprice into their respective fields under WooCommerce Add-On. Once you've dragged them it'll automatically display each of the fields with different brackets.
- SKU:
{sku[1]} - Regular Price:
{regularprice[1]} - Sale Price:
{saleprice[1]}
After click and dragging the above fields, proceed to Step 4 with Continue to Step 4 at the bottom of this page.

In Step 4, you will need to ensure your import file will only prioritise the fields you want to edit.
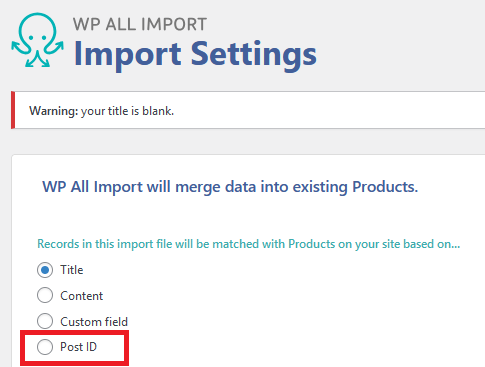
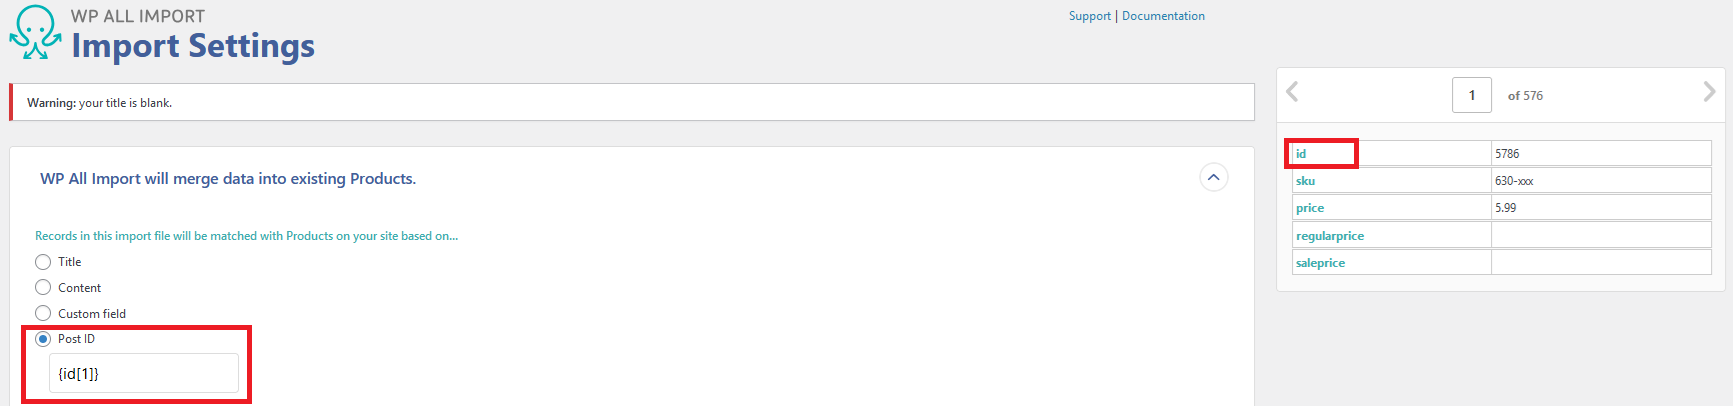
To avoid breaking other products & files in the website, select Post ID under "Records in this import file will be matched with.."
In Post ID, click & drag id field from the right-hand side of import page.
Under "For each record in this import file..", deselect Update all data and select Choose which data to update, afterwards select Unselect All to ensure that the file won't affect other parts of the website.
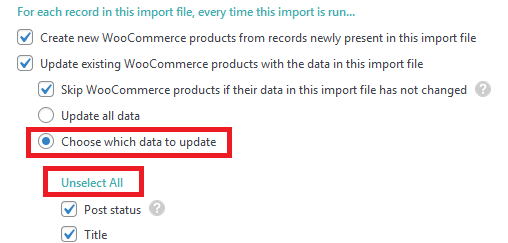
In the same section, select Custom fields, Update only these Custom Fields, leave the rest alone and input "_price", "_regular price" and "_sale price".

Proceed to continue to the next step.
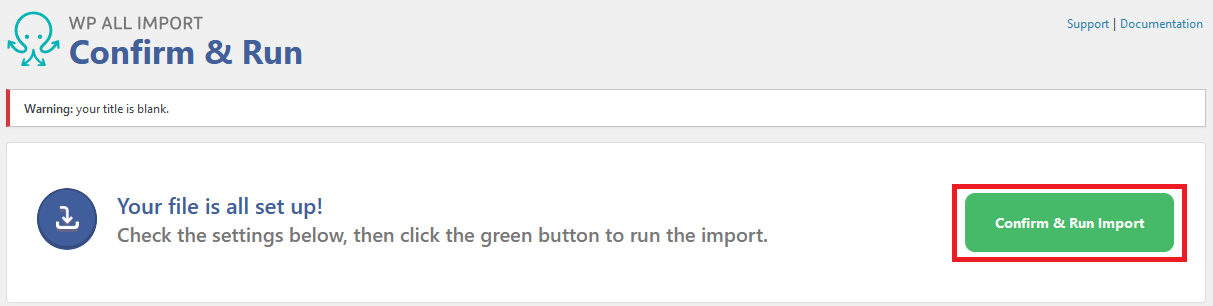
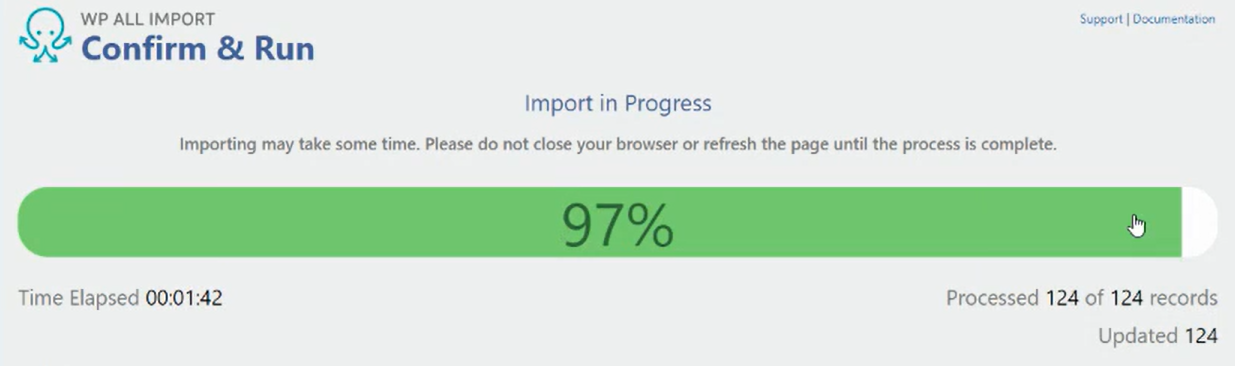
Click Confirm & Run Import to initiate the final step.
Import progress will also be displayed in real-time.
Once import is complete without any issues, you will be shown this screen, where you can go and see the product pages to see your changes.
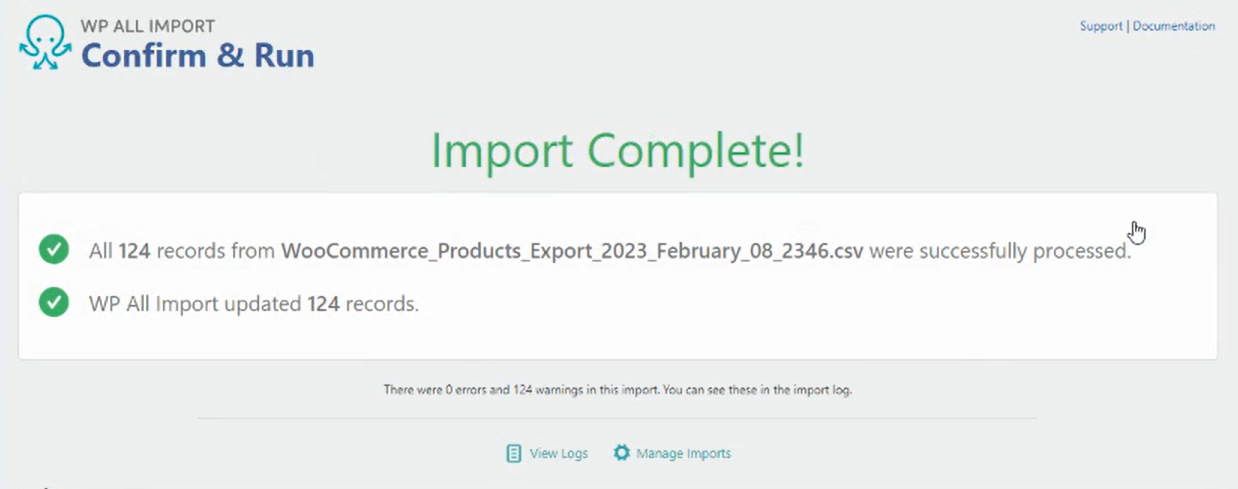
Go to your relevant product page with the adjusted price to see the result.