Attributes
This page explains how to manage product attributes in WordPress.
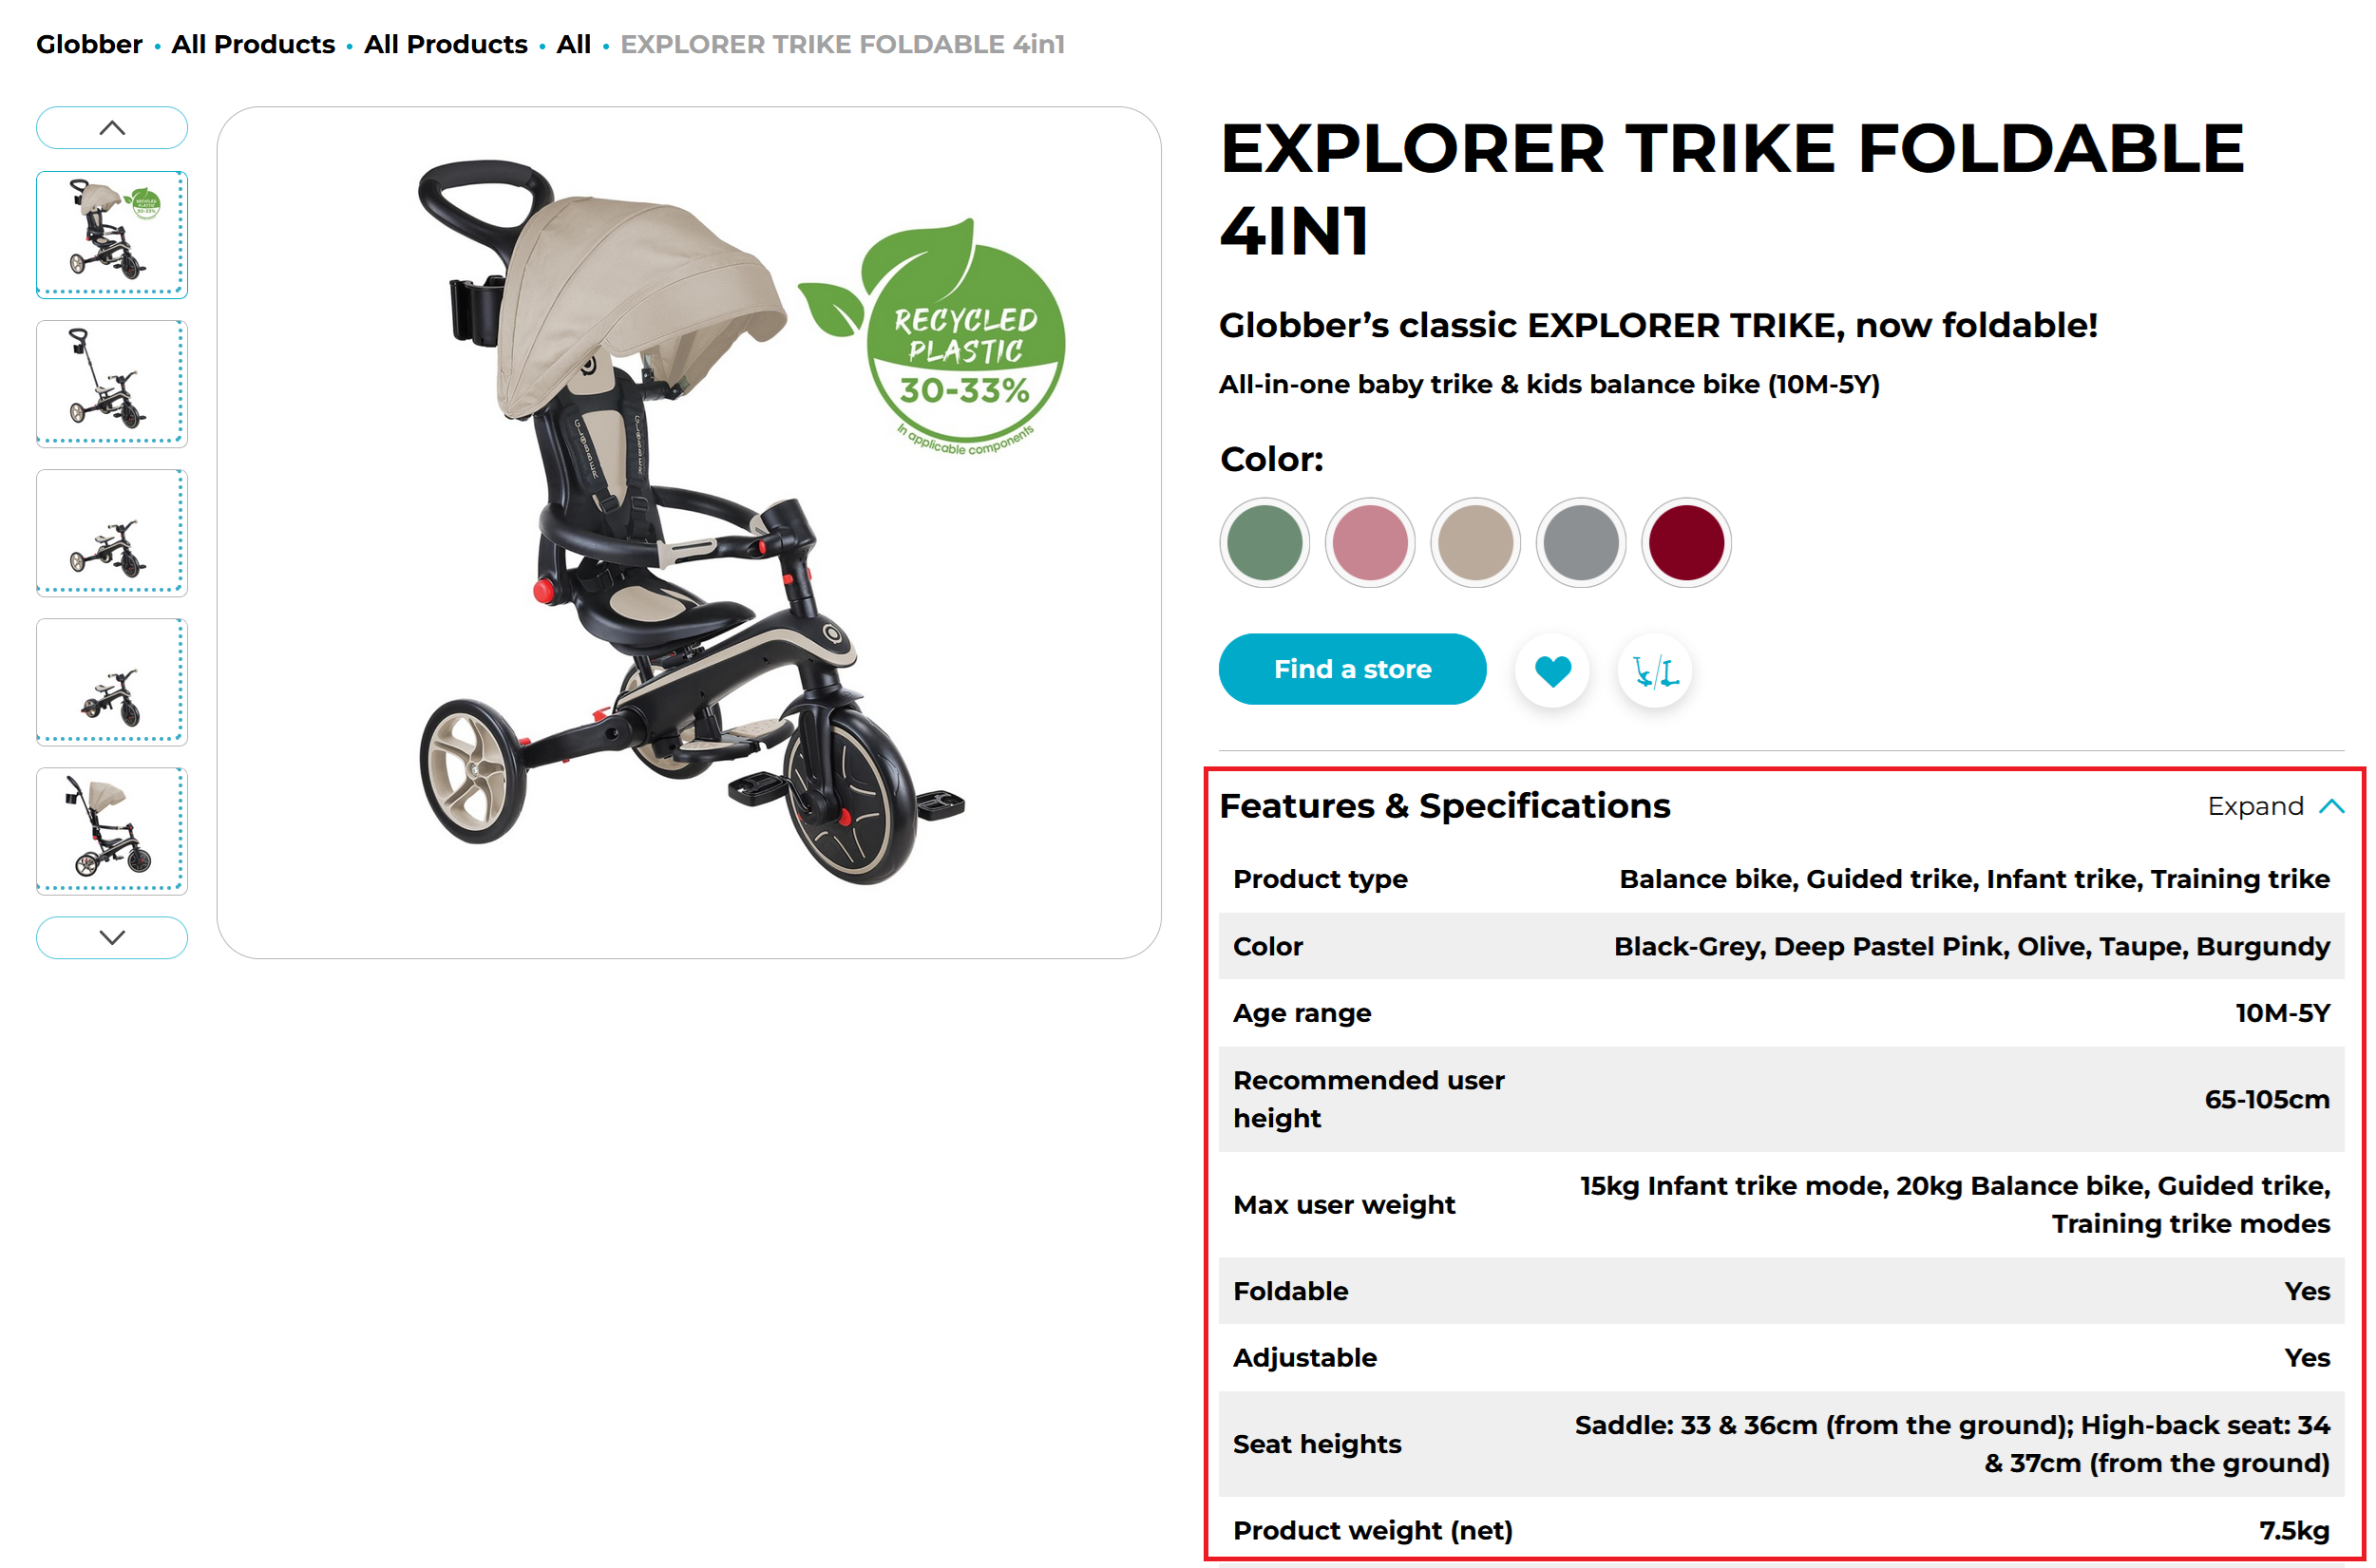
Since color swatches are a popular type of attribute, we’ll use them as our primary example in this guide.
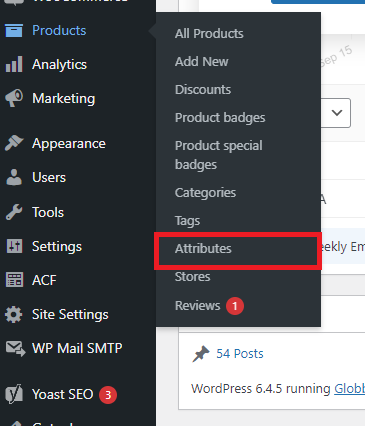
Creating an Attribute
In WordPress, navigate to Products on your left-hand side and select Attributes.
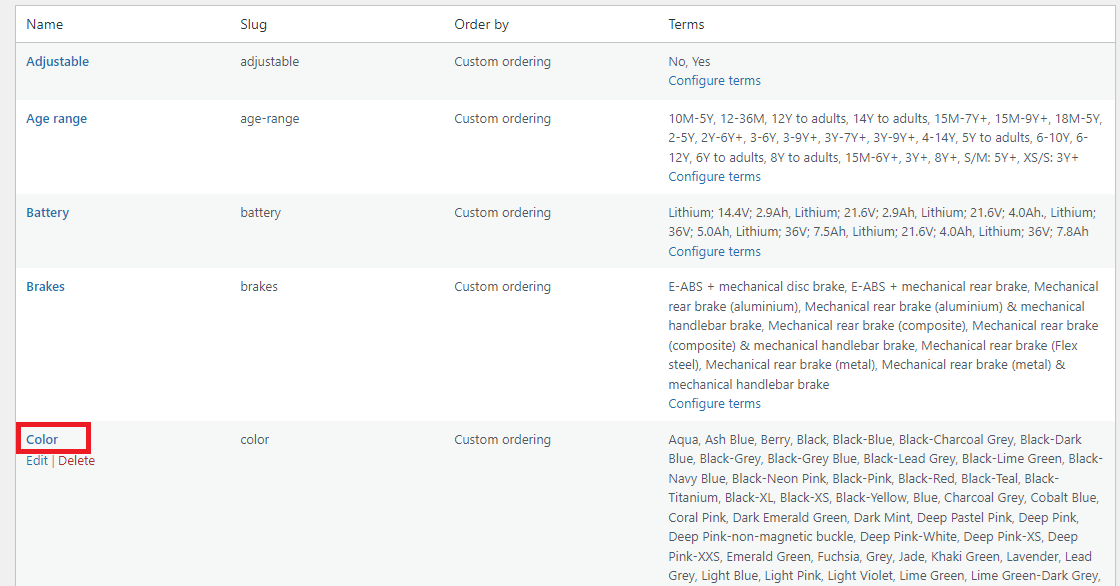
On the right-hand side of Attributes page, select Color and (DO NOT SELECT EDIT).
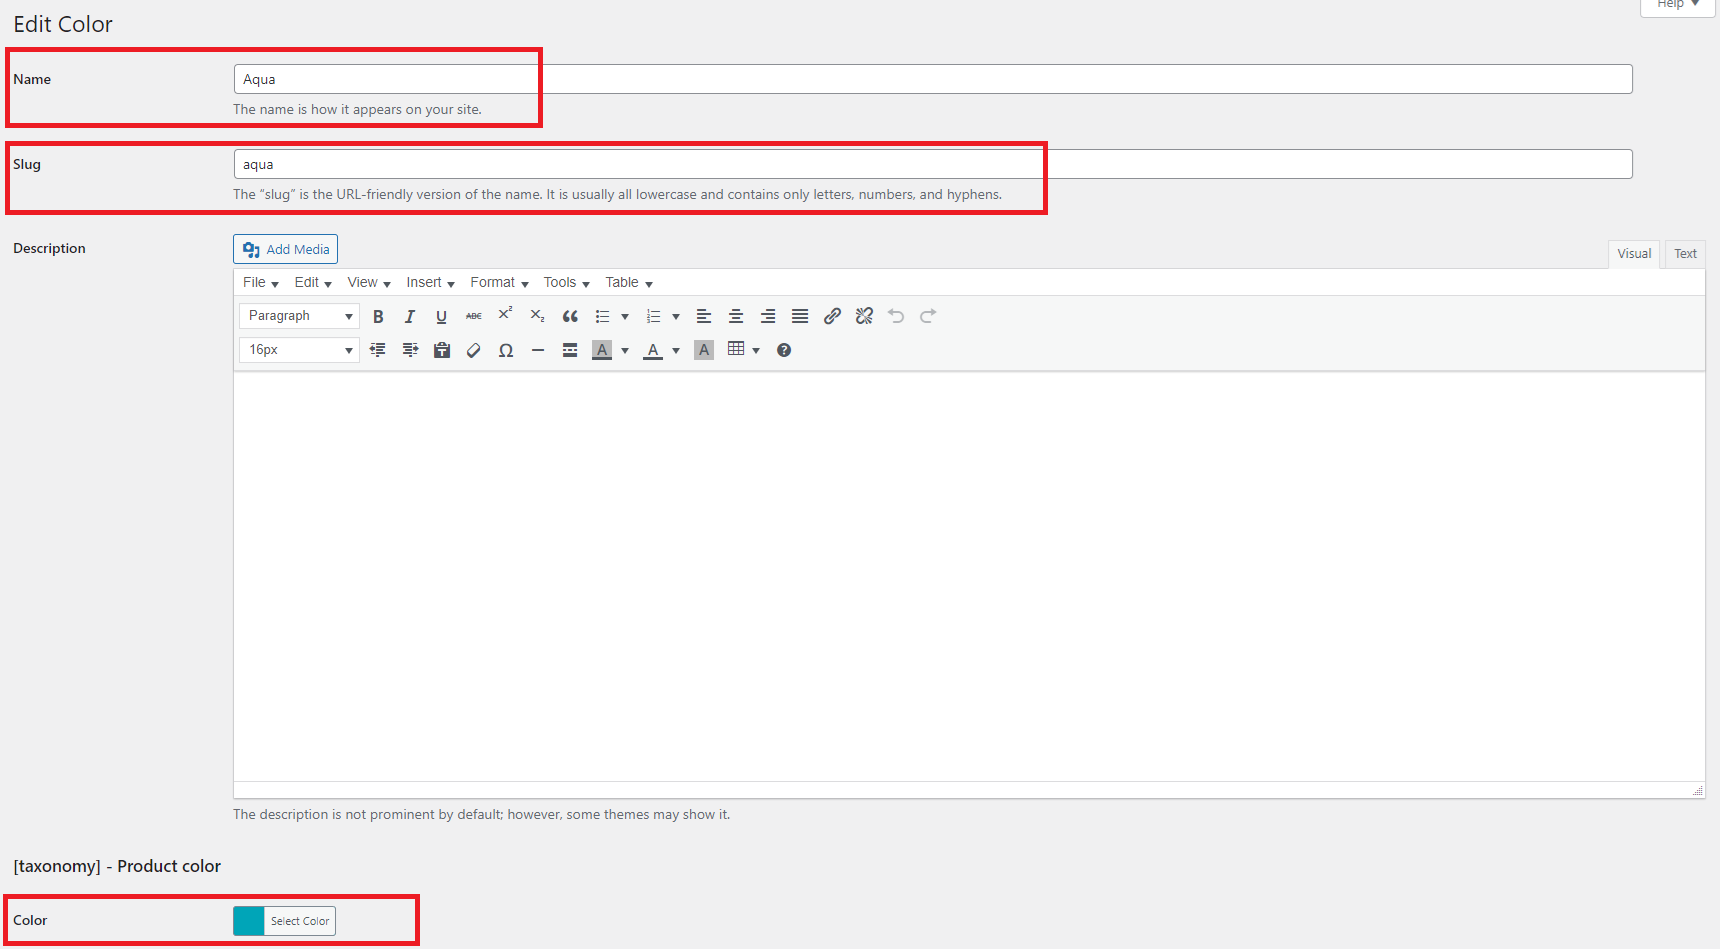
In this example, we’re using Ash Blue, so you need to fill in the Name, Slug and Color sections:
- Name: Ash Blue
- Slug: ash-blue
- Color: #7A9598
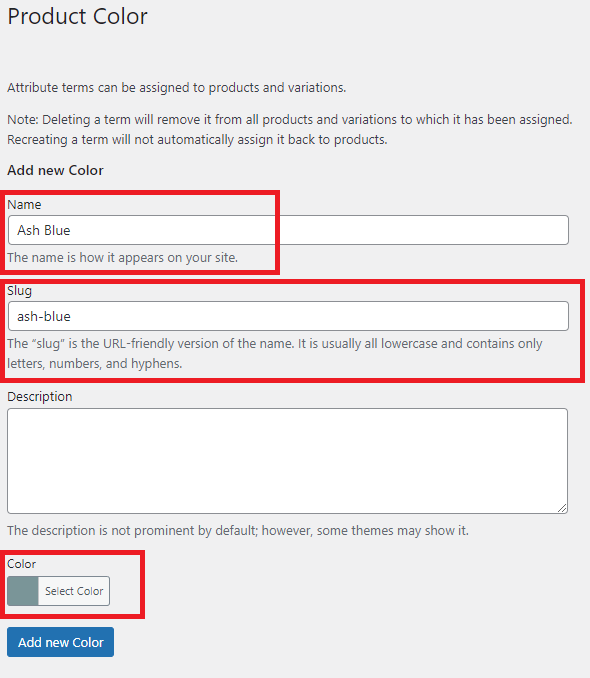
Once you finish the configuration, click Add New Color to publish your new color.
How to Select Attributes for Product
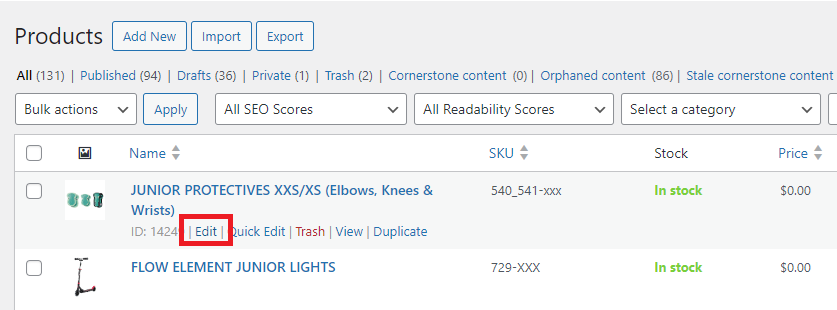
In WordPress, navigate to Products on your left-hand side and select All Products.

In the Products section, choose the product you want to edit by clicking Edit under that product.
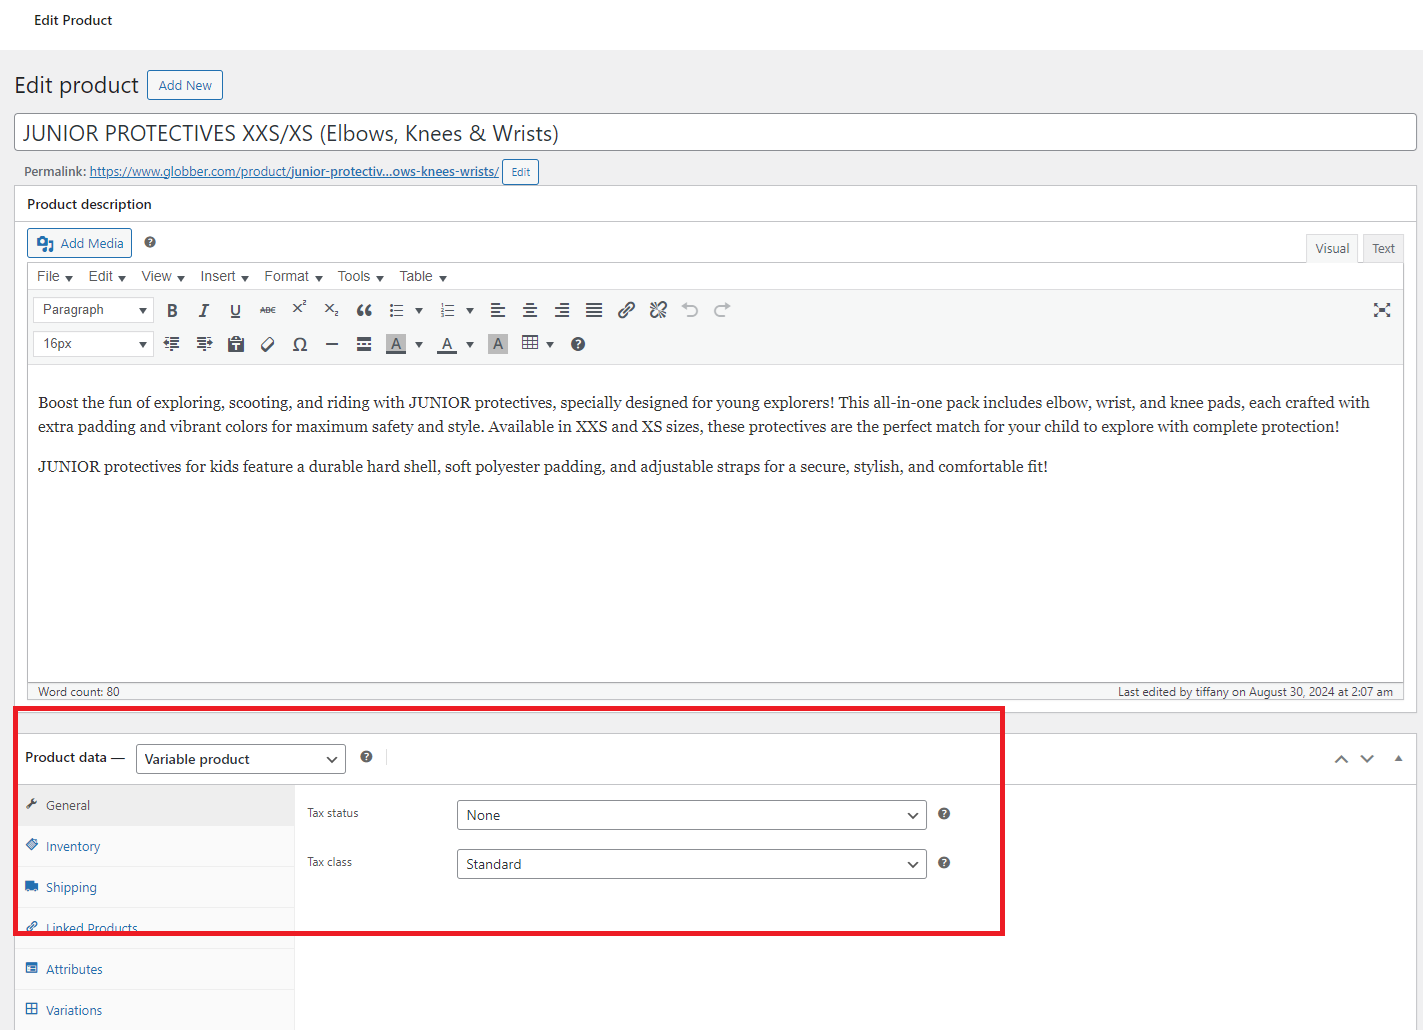
In the Edit product section, scroll down to Product Data section highlighted in the image below.
In Product Data section, select Attributes and the dropdown icon on Color tab.

In the Value(s) section, type the color you want to add to the product you’re editing.
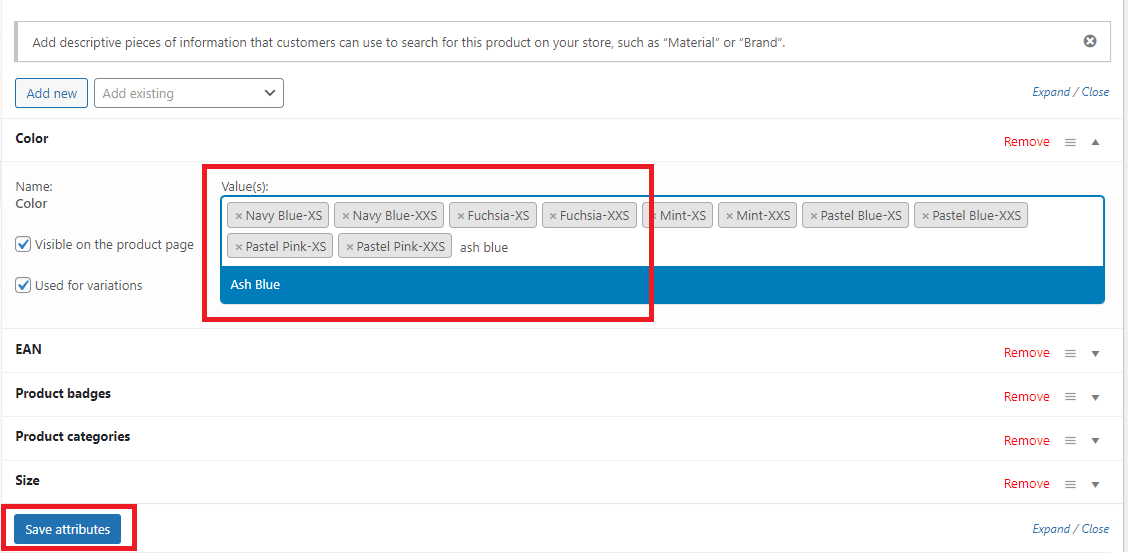
Hit Save attributes when you finish editing the product.
Changing an Attribute
In WordPress, navigate to Products on your left-hand side and select Attributes.
On the right-hand side of Attributes page, select Color and (DO NOT SELECT EDIT).
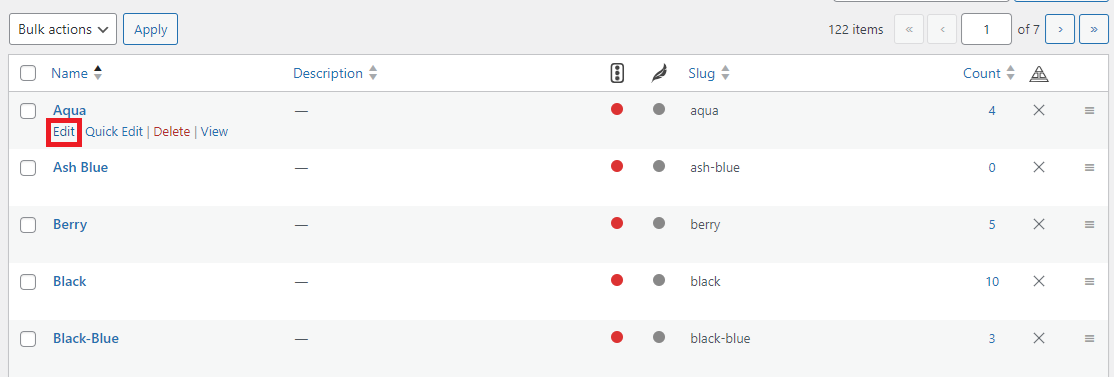
On the right-hand side of Color attribute page, you can see all existing color swatches.
Click Edit underneath the specific colour swatch you'd like to edit.
Here, you can edit the specific colour you choose. You can edit the Name, Slug and Color sections, as highlighted in the screenshot below.
After editing the specific colour swatch of your choice, scroll down and hit Update to confirm your changes.
