Homepage Hero
Use the Homepage Hero (Swiper) section to create a large homepage carousel with campaign images, optional background video, promotional text, and featured product information.
Prepare a desktop poster for every slide. You can also prepare a mobile poster, MP4 or WebM video, campaign text, a link, and a published WooCommerce product.
Open the Home V2 page
- In the WordPress dashboard, select Pages > All Pages.
- Find the page marked Front Page and select Edit.
- Confirm that Template is set to Home V2.
- Scroll to the [page] - Home V2 panel.

Add the new hero section
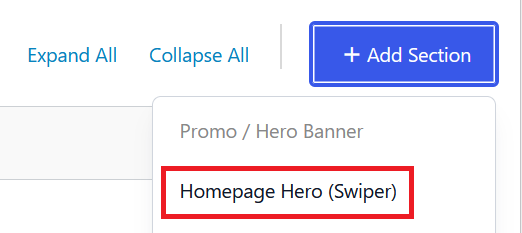
- In Sections, select Add Section.
- Choose Homepage Hero (Swiper).
- Drag the new section to the position where it should appear. The hero is normally the first section on the page.
Configure the carousel
Set the options that apply to the whole hero:
| Field | What to enter or choose |
|---|---|
| Accessible Label | Optional description announced by screen readers. If left empty, the website uses “Featured products and promotions”. |
| Enable Autoplay | Turn on to move through multiple slides automatically. Visitors can pause and restart the slideshow. |
| Autoplay Delay (ms) | Time before the next slide appears. The default is 6000 milliseconds, or 6 seconds. Use a value from 3000 to 30000. |
| Show Wave Background | Turn on to show the decorative wave along the bottom of the hero. |
Leave enough time for visitors to read each slide. Start with 6000 milliseconds and increase it when a slide contains more text.
Add a slide
- In Slides, select Add Row.
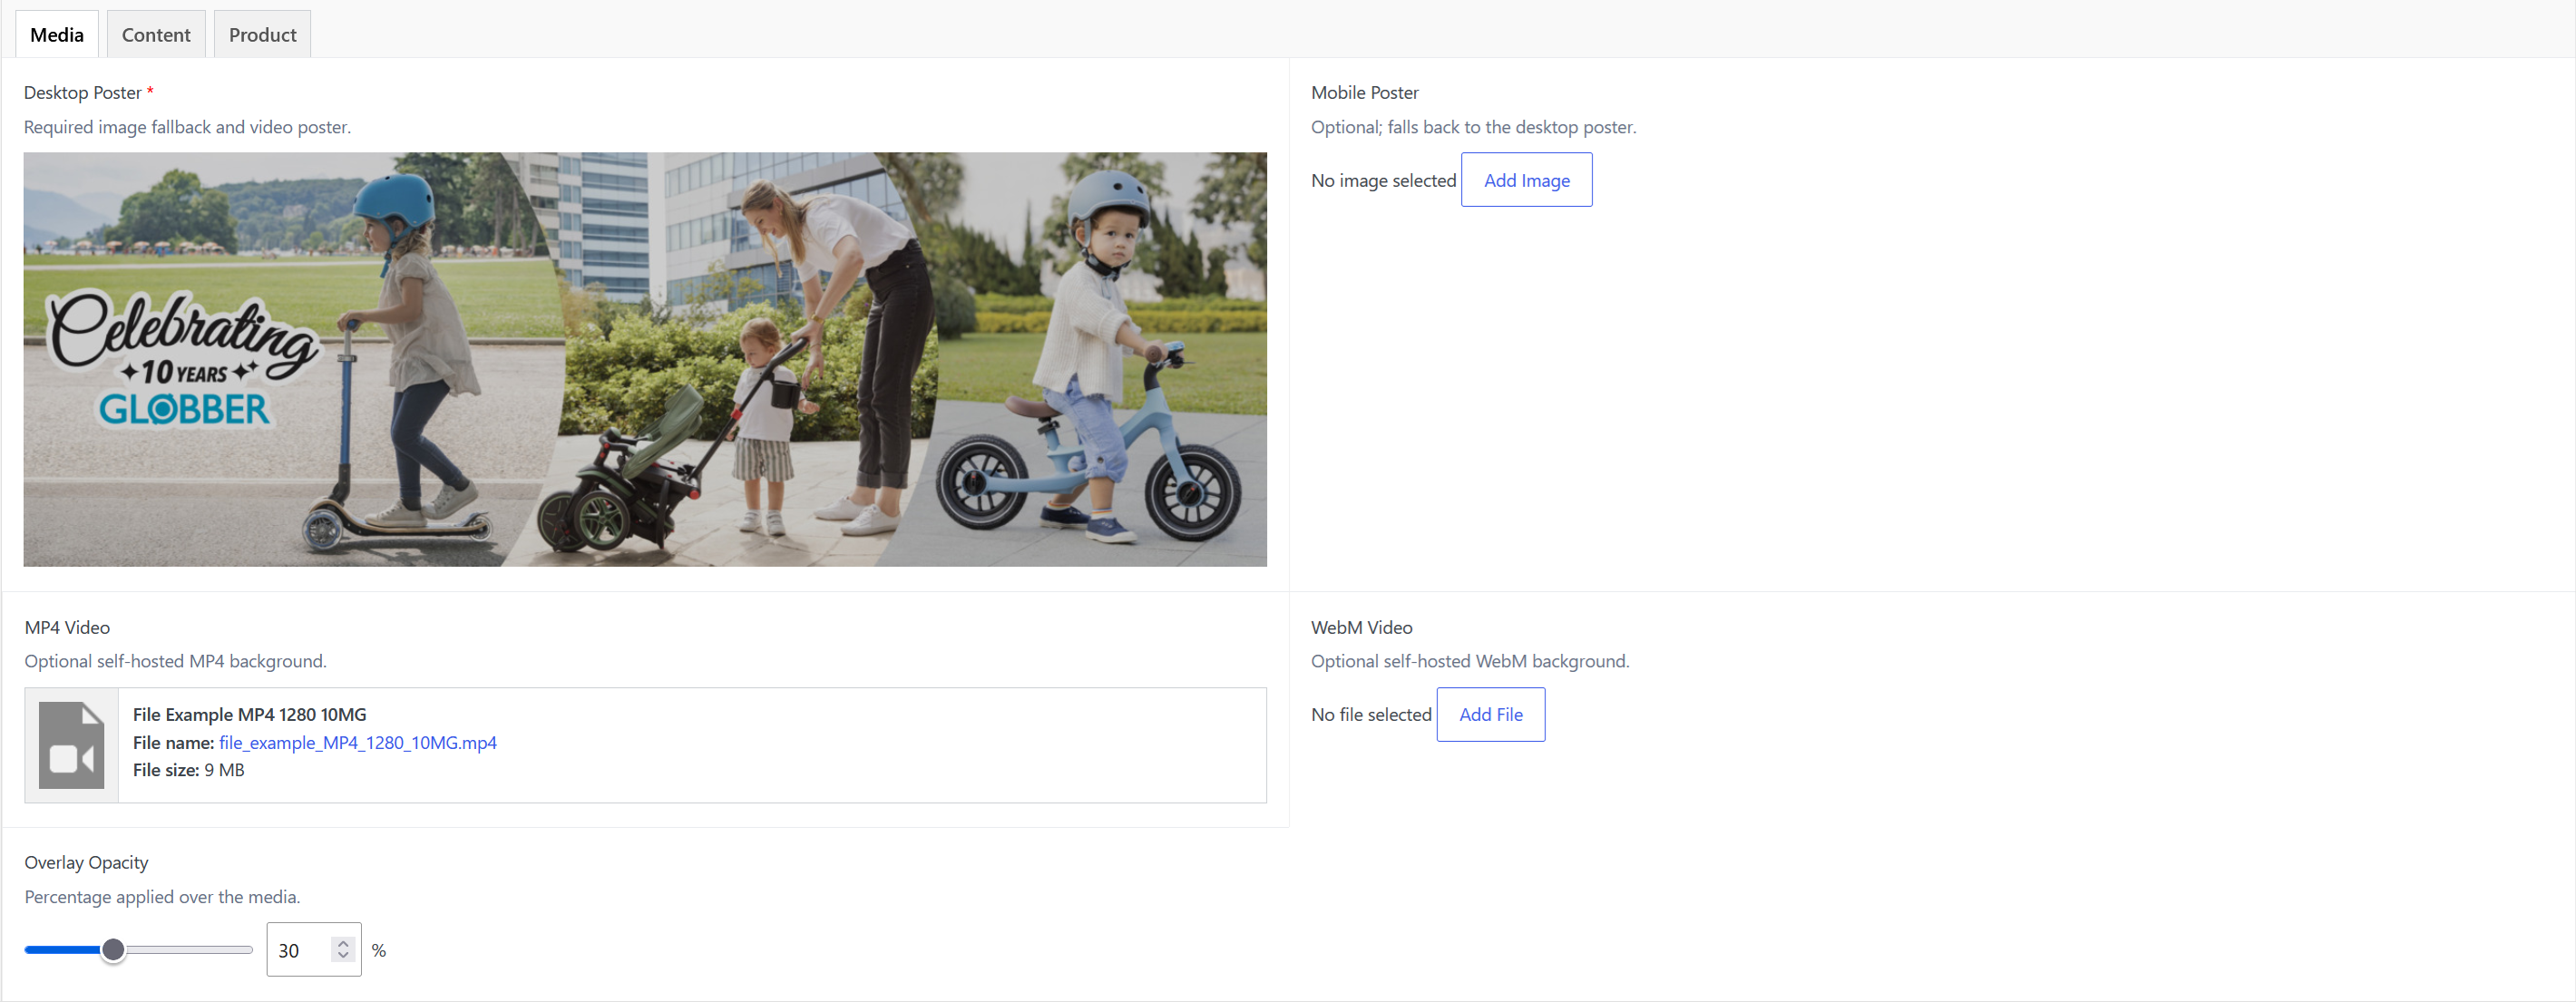
- Open the Media tab.
- In Desktop Poster, select the main image. This field is required and is also used while a video loads or cannot play.
- In Mobile Poster, optionally select an image designed for smaller screens. If left empty, the desktop poster is used.
- In MP4 Video and WebM Video, optionally select self-hosted background video files.
- Set Overlay Opacity to improve the contrast between the media and text.
Always add a suitable Desktop Poster, even when the slide uses video. Mobile devices and data-saving browsers may show the poster instead of playing the video.
Add slide text and a link
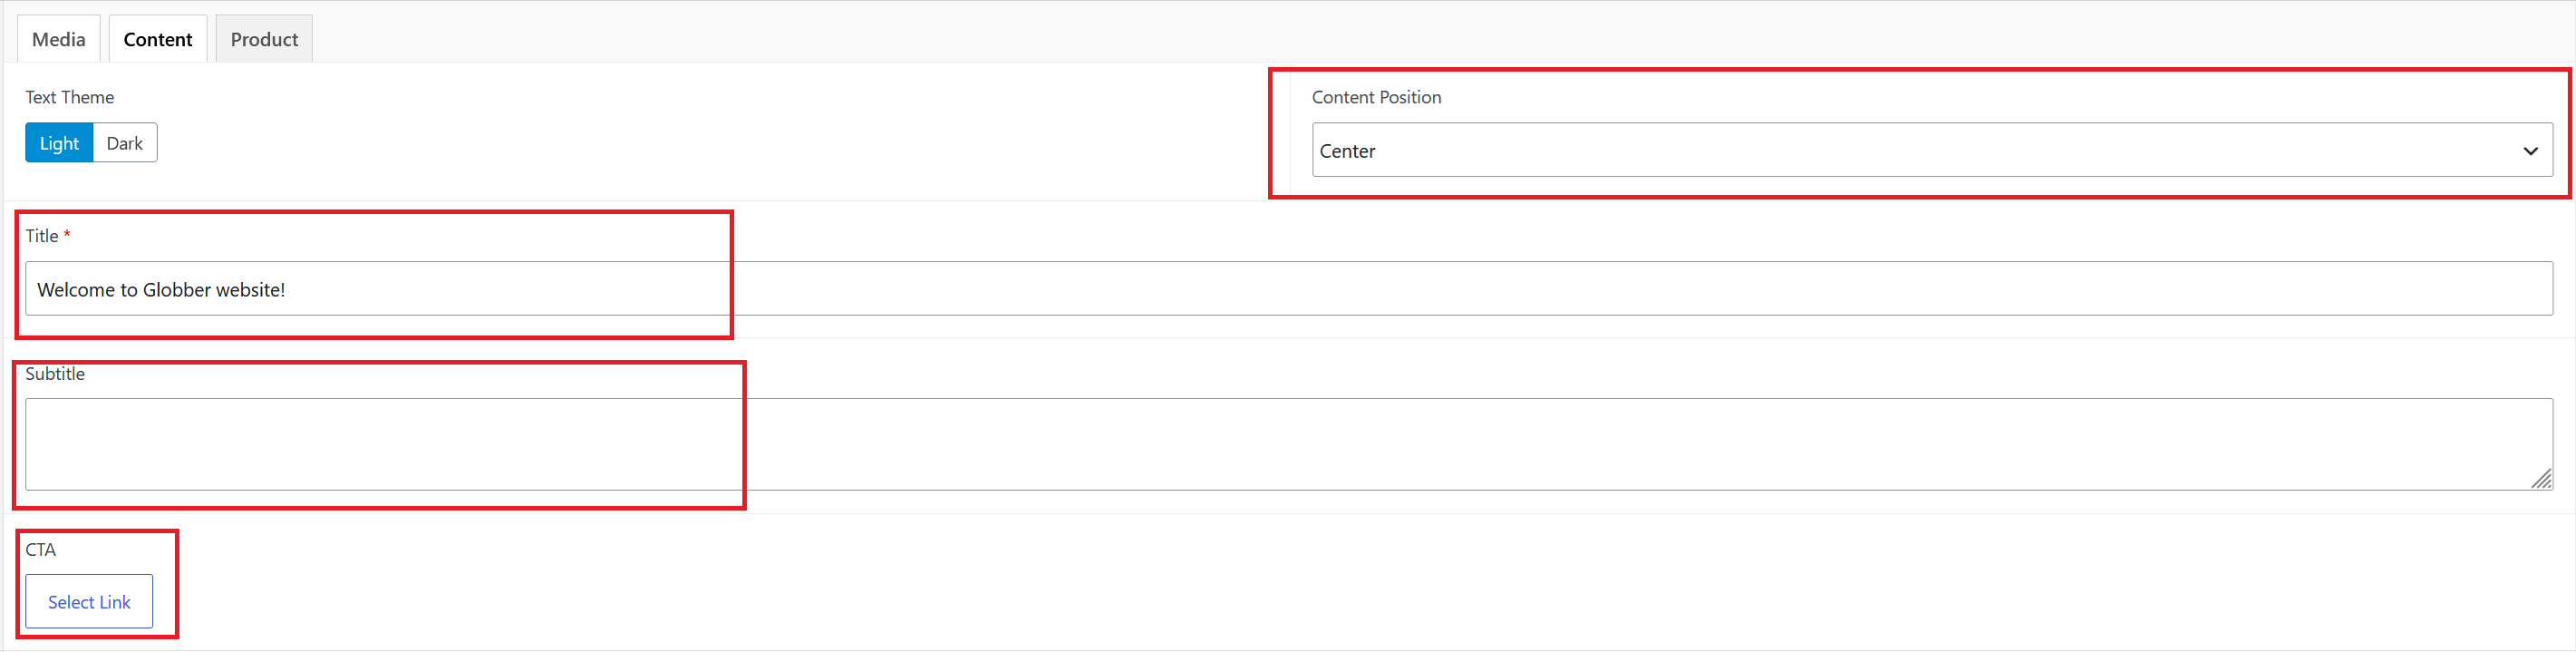
- Open the Content tab.
- Choose Light or Dark under Text Theme so the text contrasts with the poster or video.
- Choose where the content appears under Content Position:
- Top left
- Top center
- Center
- Bottom left
- Bottom right
- Enter the required Title.
- Enter an optional Subtitle.
- In CTA, optionally enter the button label and destination link.
Add an optional product card
- Open the Product tab.
- In Product, search for and select a published WooCommerce product.
- In Product CTA Label, optionally replace the default View product link text.
The product card uses the product's current name, price, sale state, stock availability, and product-page link. Update that information in the product editor when it is incorrect.

Add more slides
- Select Add Row for each additional slide.
- Complete the required Desktop Poster and Title fields.
- Drag the slide rows into the order customers should see them.
- Review the text theme and overlay for each slide separately.
Enable and publish the new hero
Enabling the new hero changes the live homepage after you select Update. Review all slides before switching it on.
- At the top of the [page] - Home V2 panel, turn on Use New Homepage Hero.
- Select Update.
- Open the homepage in a private browser window.
- Check the desktop and mobile posters, text contrast, links, product details, slide controls, and video fallback.
When Use New Homepage Hero is on, the website shows Homepage Hero (Swiper) and hides the legacy Promo / Hero Banner.
Return to the legacy banner
- Edit the Home V2 page.
- Turn off Use New Homepage Hero.
- Select Update.
- Open the homepage and confirm that the Promo / Hero Banner is visible again.
The new hero and legacy promo content remain saved in Sections, allowing you to switch between them without rebuilding either section.